Horse panel ripped in half and place in dados.
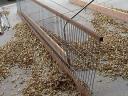
Well, I am back in the pen construction business. There are a couple of improvements that I want to make to our broiler pens. First we want to be able to service the birds from one side only. This is not a huge thing with a single pen; however, with multiples this becomes more and more important. Second, we want to be able to feed and water the chickens from the outside of the pens. If we do this we can eliminate the ‘easy open’ top that has causes aerial predator problems. Third, we want to avoid having to walk in the fertilized zone behind the pens. To address these issues and make the pen more durable and predator proof we are building new pens. The pens will be slightly bigger 8’x16′ and made from horse panels. These panels are the reason for the size change. They come in 60″x16′ so 1 1/2 panels will make one pen. These panels are expensive ($65 a piece) so we need to use every inch. Horse panels have 2″x4″ holes which should be good to block predators. The panel will be covered with poly or shade cloth depending on the season. The panel is framed in wood, a 2×4 for the bottom skid and a ripped 2×4 for the top rail. Ripping the dado is key to this design. The panel fit in nicely and we secured it with a couple of screws catching the inserted horizontal wire. After putting a second side panel together, Hazel and I worked on squaring up the two sides with conduit. I am a conduit bending novice so it took a bit to figure out how to make two ninety degree turns and come out to the right length. Good thing conduit is pretty cheap. 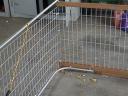 As you can see in the picture the end panels are not framed but tied to the bent conduit and the side panels. Another key feature of this pen will be the flexibility in the corners. All four corners are wire tied to allow for some flex but still not collapse when we need to make a turn (thanks to the conduit). The top rail on the end panel is there to snap the poly cover over. The waterer is a gravity fed bell waterer. The reservoir pipe is long enough to hold about 2.5 gallons. This is a bit less than out current set up. This may come back to haunt me as I skimped and just used the pipe I had laying around. I should probably shift to 3″ pipe later on (this would hold about 4.4 gallons).

Pull poly over channel and walk in the zip wire.
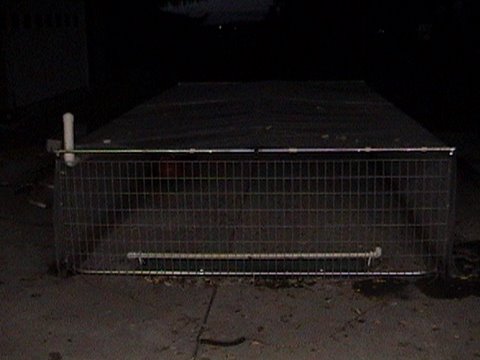
Wire lock is great! This channel locks in the poly covering with a zig-zag wire. Easy to put in and holds very snug. We plan on using poly in the spring and fall and switching to shade cloth in the summer. This wire lock will allow us to do this without too much pain. Once the poly was wrapped around the broiler pen I just cut some PVC to make snap on clamps to hold the ply to the end wall top rails. For rain run off, just but a small bend (15 degree maybe) in the center of a 10′ piece of conduit and hammered the ends flat and screwed it into the top wooden rail of the side panels. Then just Tee into the center and run out to the end walls. We will see how this works- good thing we only get 9 inches of rain a year…and most of that is in the winter.
No responses yet